News
- 30 August 2024
- LiteManager 5.2 Two-factor authentication
-
Two-factor authentication (authorization) on the LM server using an LM code via email, via your personal SMTP server. New console app for Linux (daemon).
- 05 August 2022
- LiteManager update 5
-
NOIP authorization on LM Server. (NOIP as the central authorization server)
Managing LM Server settings on NOIP. (SSC NOIP) - 21 October 2021
- A new website design LiteManager.org
-
Litemanager — remote support software
- 31 May 2015
- LiteManager remote access tools
-
Free remote access over the Internet with IP or ID connection. QuickSupport mode works without installation for Windows. Demonstration and online Presentation.
Network map
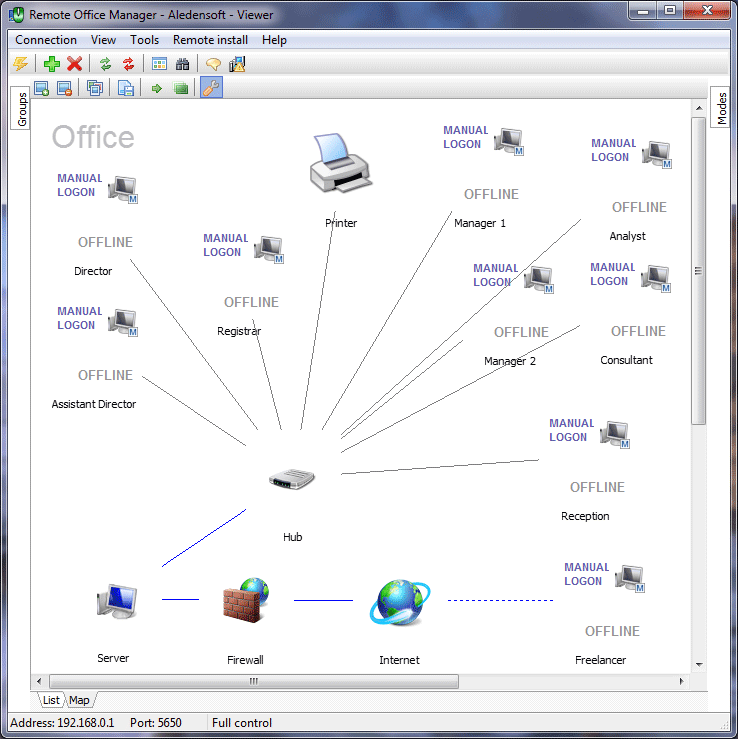
You can arrange connections on the map the way you need it. To make it more convenient, you can use the additional window to draw lines between them, highlight them with colors, add additional objects. All connections remain completely interactive, which means that you can open the necessary mode with a click on the connection you need.There are two styles for arranging connections: as regular groups and as layers. You can create and delete layers, move connections between them to separate them in a more comfortable way. You can use the edit mode to configure the map. Additional windows with object and map properties appear once you enable it. Some options are available on the context menu of the map and connections.

Network map
Main features:
- Arranging connections the way you like it.
- Customizable lines between objects.
- Highlighting.
- Layers.
- Resizable map.
- Comfortable navigation.
- Setting the necessary size and distance between objects.
- Creating a map snapshot.
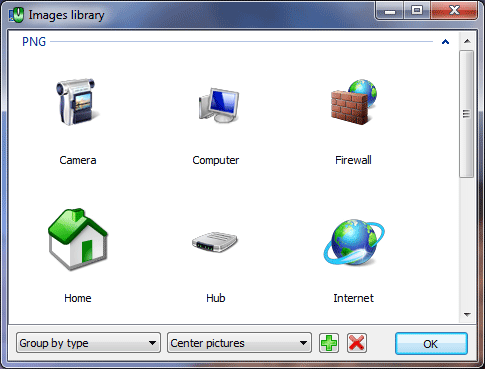
- Image gallery where you can add and remove images.
To add a new object, open the image gallery (the «Add image» toolbar button), select the necessary image, and click «OK». If there is no necessary image, add it to the gallery.
If you need to remove an object, select it and click the «Remove selected image» button.
To select several objects, hold down the «Ctrl» or «Shift» key and select the necessary connections with the mouse.

Image library
To draw a line, right-click a connection and select the «Line to…» command on the menu. Then move the cross pointer over the target object and click the left mouse button. To cancel the operation, click the right mouse button. If you need to select the color or style of the line, switch to the edit mode, select the connection and specify the necessary style and color for the line in the settings.
To switch to the edit mode, click the «Edit mode» button on the map toolbar.
To highlight an item with color, switch to the edit mode, select the necessary items, select the necessary color on the «Item color» tab in the map settings and click the «Set color for selected items» button. You can also set color for an item in the item settings dialog box.
Use the «Use group hierarchy» item on the context menu to switch between the layer and group modes.
To create a new layer, switch to the edit mode, select the «Layer» tab in the options, enter the name of the new layer and click «Add».
To quickly switch between layers on the map, use the «Select layer» item on the context menu.
To quickly move objects between layers, select the necessary objects and use the «Move to layer» command. If you remove a layer, all its objects will be moved to the «Main layer».
To draw an arbitrary line on a map, use the menu to create a line.

