- 30 August 2024
- LiteManager 5.2 Two-factor authentication
-
Two-factor authentication (authorization) on the LM server using an LM code via email, via your personal SMTP server. New console app for Linux (daemon).
- 05 August 2022
- LiteManager update 5
-
NOIP authorization on LM Server. (NOIP as the central authorization server)
Managing LM Server settings on NOIP. (SSC NOIP) - 21 October 2021
- A new website design LiteManager.org
-
Litemanager — remote support software
- 31 May 2015
- LiteManager remote access tools
-
Free remote access over the Internet with IP or ID connection. QuickSupport mode works without installation for Windows. Demonstration and online Presentation.
Centralized control of servers settings through NOIP synchronization.
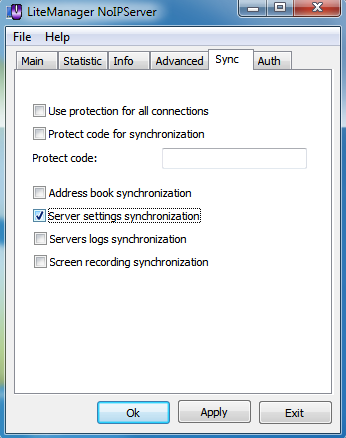
Turn on the server settings synchronization on NOIP, on the «Sync» tab check the option «Server settings synchronization», and run NOIP.

On the Viewer side, open the window of Server settings manager, Main menu — Tools — Server settings control.

On the options tab specify the NOIP, which is used for synchronization, the settings of NOIP are automatically taken from «connection by ID» or you can specify other settings.

On the first tab «Servers settings» refresh the list, the status should display «Success: connected to NOIP», but the list at first will be empty because the server is not yet connected.

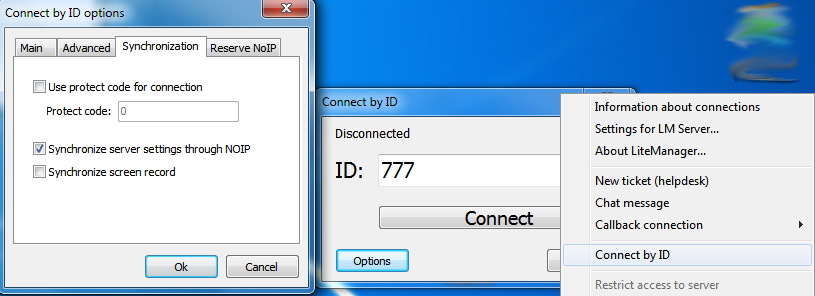
What would the server synchronize their settings through NOIP, it is necessary in the settings of «connection by ID» on the server side, on the «Sync» tab, check the option «Synchronization server settings through NOIP».

It is necessary to connect the connection by ID, because the synchronization is conducted via the connection by ID, in the server options you can enable auto connect for the connection by ID and restart the server.

The server is connected and its settings are synchronized.
Now on the Viewer side, in the server settings control window, refresh the list of servers.

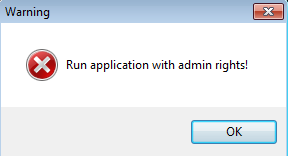
In the list appears the entry with the server settings. Selecting it you can change its settings, NT permissions and screen recorder options. To change the server settings will need to run the Viewer with admin rights, so you can receive this message.

Restart Viewer with admin rights, then you can change the settings of the server.

Changing NT permissions and screen recorder options is does not require admin rights for Viewer.

Sync allows you to view the data of the log files and screen records files. To enable synchronization for log files and screen records files, need to enable these options on NOIP, on the synchronization tab.

On the server side, logging of events must be enabled, on the «Advanced» tab check the option «Use event log».

To synchronize the screen recordings you need on the server side in the settings of connection by ID, on the tab «synchronization» check option «Synchronize screen record».

The screen record mode must be active, sync will be the current active record file. The whole synchronization process is done through a connection by ID, for a good work connection by ID to the NOIP must be connected. Suggest that you after the enabling of additional synchronization options, restart the server.
After a short period of time on the Viewer side, the Viewer window displays information about the log file and screen record file.

These data can be downloaded and viewed.
Additional information
Servers settings control manager

