- 05 January 2024
- LiteManager 5.1 for Linux, Mac OS, Android with inbuilt LM Server and NOIP.
-
Control remotely your Linux and Mac, available remote screen and files modes. Android screen in view only mode.Built-in NOIP for Linux.
- 05 August 2022
- LiteManager update 5
-
NOIP authorization on LM Server. (NOIP as the central authorization server)
Managing LM Server settings on NOIP. (SSC NOIP) - 21 October 2021
- A new website design LiteManager.org
-
Litemanager — remote support software
- 31 May 2015
- LiteManager remote access tools
-
Free remote access over the Internet with IP or ID connection. QuickSupport mode works without installation for Windows. Demonstration and online Presentation.
Avi record
Avi recording is aimed for recording of a remote control/viewing session to an Avi file. 
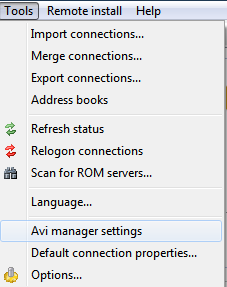
Avi recording settings can be watched in the menu «Tools — Avi recording settings». 

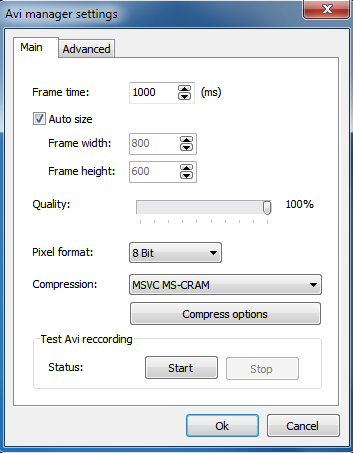
You can fix Avi recording in the appeared window.
You can set one shot time, which means a millisecond interval between two shots. The default interval is 1000 milliseconds = 1 second.
The size of a video also can be regulated. You can define it yourself or tick off «automatically“ and then the file size will be the same as its source’s, for instance the size of the desktop.
Then you can set the image quality. The higher it is, the better the picture, but the bigger the Avi file size.
Set the color depth and the compression type. These two parameters are connected, for example with the 8 bits color depth one codecs will be available, and with 24 bits the others..
On the choice of compression the quality of the image, the Avi file size and the processor capacity during recording will depend.
When choosing a compressor, you’d be at ease to use a recording check in order to verify the codec’s and its characteristics’ efficiency. During the test your desktop will be recorded.
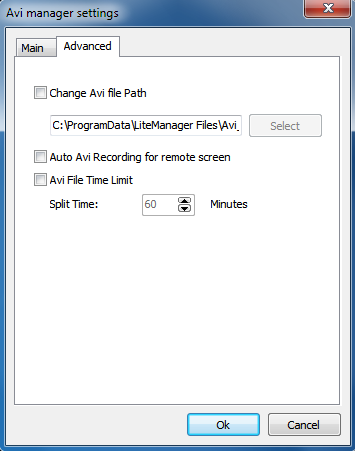
Into the item ‘Extra» you can impute the path for your Avi files storage and switch on Auto recording of the desktop viewing mode, or set time limitation of Avi file.
To turn on the desktop Avi file recording use the pop-up menu. ![]()
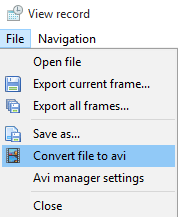
The mode «Remote Screen Recording on the schedule» allows to convert *rtf files to Avi ones.


