- 05 January 2024
- LiteManager 5.1 for Linux, Mac OS, Android with inbuilt LM Server and NOIP.
-
Control remotely your Linux and Mac, available remote screen and files modes. Android screen in view only mode.Built-in NOIP for Linux.
- 05 August 2022
- LiteManager update 5
-
NOIP authorization on LM Server. (NOIP as the central authorization server)
Managing LM Server settings on NOIP. (SSC NOIP) - 21 October 2021
- A new website design LiteManager.org
-
Litemanager — remote support software
- 31 May 2015
- LiteManager remote access tools
-
Free remote access over the Internet with IP or ID connection. QuickSupport mode works without installation for Windows. Demonstration and online Presentation.
Remote installation and MSI configurator
In order to remotely install the program's server module, you first need to create a connection to this computer.
Launch the remote installation mode from the program main menu or from the context menu of the connection.
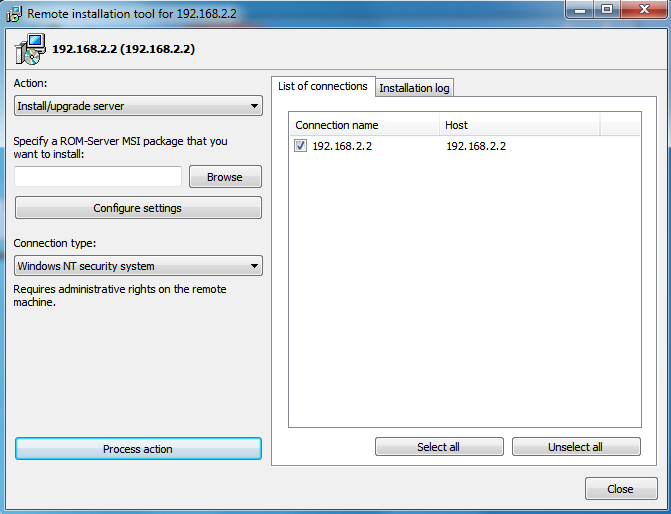
In the remote installation window, you can see installation options and a list of computers on which the server module will be installed.
Choose the distribution of the LiteManager server module using Browse button.
If you perform remote installation on the computer, where LiteManager server module was not installed previously, then the server will be installed without settings and you cannot connect to it, as the access password was not set. If the server module has been already installed on the remote computer, you can specify server settings using configurator of the distribution. In this case update procedure will be performed and all settings of the program will be saved.
You can launch the distribution configurator by pressing Configure button.
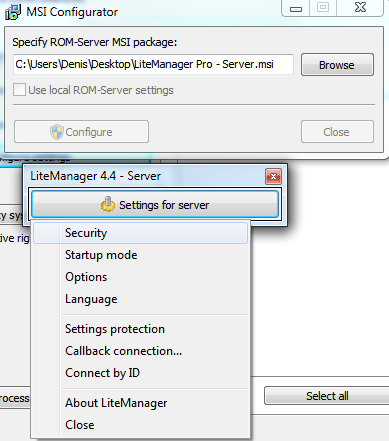
Then press Configure button to open the window where you can configure settings for the server module.
Choose Security item and set an access password to the server.
After you specify necessary settings, for example, security password, close the window with server module options. 
The program may display an error message informing that you have to run the program as an administrator.
You should restart the client module Viewer as an administrator and perform the remote installation procedure.
Now that the distribution is configured, start the remote installation by pressing Perform action button.
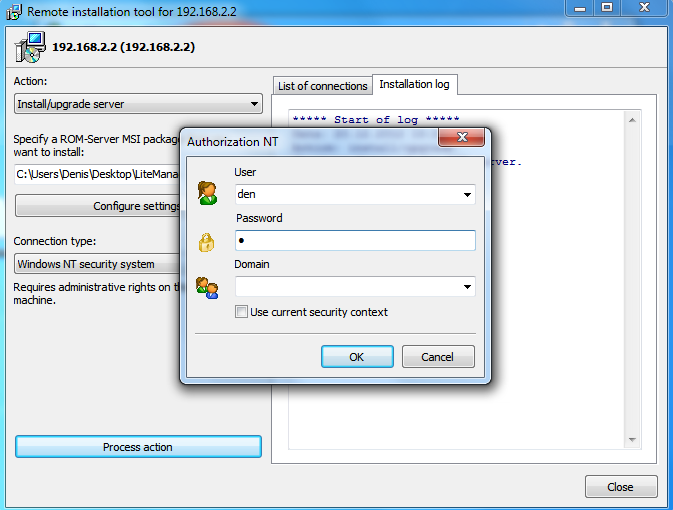
When using NT authorization, a window for entering an administrator name and password on a remote computer may appear.
The installation process and its result will be displayed on the text log.
After installation you can connect to the remote computer using the access password that was set during configuration of the server distribution.
Additional help information
Distribution configurator
Remote installation
Installation without installer

